Repairing Boot Problems Without a Windows DVD

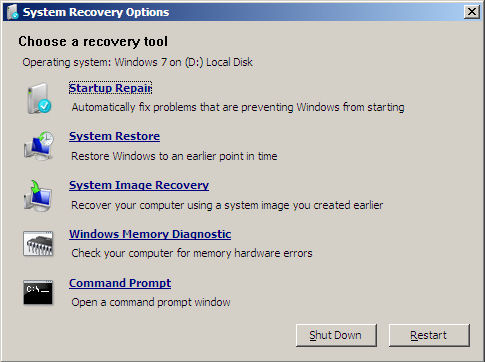
Yike. Windows won’t boot.  Microsoft says to boot the Windows install DVD, and run the windows recovery environment, like this:  How to use the Bootrec.exe tool in the Windows Recovery Environment… (Note the note about trying the Startup Repair option first)

That’s fine, except that your computer vendor didn’t include a Microsoft install DVD, only their proprietary install image, or maybe nothing at all.  Maybe you have an install DVD, but no optical drive.  Don’t give up hope, there are several ways to skin this cat.

That’s where you want to end up, and here are a couple of ways to get there.

Of course, if you have the appropriate MS install DVD, just boot it.  If you had the foresight to create a System Repair Disk ( Start -> Maintenance -> Create System Repair Disk) before the crash, just boot that.  Failing that, ask a friend with same OS – Vista or ‘7, 32 or 64 bit must match – and boot that.

If you don’t have access to a repair disk, Neosmart had made free ISO downloads available: Windows Vista Recovery Disc Download, Windows 7 Recovery Disc DownloadBe sure to burn the ISO to CD as an image – not as a data file.

Update 2012.04.18  Neosmart is now charging for those ISO downloads.  Another option (with a reasonably fast internet connection and a DVD burner) is to download a (legal) ISO of the Microsoft full install DVD, burn that, and boot it.  As stated, chose one with a “bitness”(32 or 64) that matches your install.  LEGAL Windows 7 Download Links

Those without a built-in optical drive will need either an external drive, or if their machine will boot from USB (most do these days) the recovery media can be put on a bootable USB flash drive.  Neosmart instructions are here:  How to make a windows 7 or Windows Vista USB Recovery Stick (thumb drive)  In my experience, adding “QUICK” (without the quotes) to the format command will speed things up.  A lot – especially if this is being done with a large external hard drive instead of flash.  If you select the wrong disk, you may trash your system!

This approach can also be used to copy a System Repair CD, or the entire MS install DVD if available to bootable flash, if the flash drive is large enough.  If physical media is available, just create the bootable flash drive, and copy the files.  It isn’t necessary to fool with ISOs.  If you do have to go the ISO route, I prefer 7zip for extracting the files from an ISO.  It’s a very versatile tool that can do much more than just unroll ISOs.

Finally, it’s also possible to boot an ISO file directly.  I use grub + memdisk, since that’s the way I boot my multi, multi, multi boot “swiss army” flash drive.  That makes it easy to have multiple versions of the rescue software (32 and 64 bit, for instance) on a single drive.  More on that later.  In the meantime, other approaches are here: Bootable USB Flash Drive Tools.

Posted in Default | 4 Comments

Bootable USB Flash Drive Tools

Back in the day – you know, when we had to walk uphill to school both ways, with nothing but a paper sack for a hat – we had to make our bootable USB flash drives by hand.  Like this: Knoppix Linux and Grub Bootloader on USB Flash.

These days, there is an abundance of GUI tools.  Here are few (windows-flavored) that can make bootable drives from ISOs: UNetbootin, XBOOT (I haven’t tried it), and YUMI – Multiboot USB Creator.

I’ll post an aritcle about a more modern command-line approach one of these days.

Posted in Linkdump | 1 Comment

Sudoku Solver

The Mrs. is a Sudoku solving machine.  Me, not so much.  I don’t think I’ve ever gotten one right.  I aways screw up something with fatal results.  Out of desperation, I wrote a tcl/tk program to help.

This little toy program was really just a learning exercise.  I’d never done anything with a GUI before, so this was a good opportunity to give it a try.  Tcl/tk was an obvious choice, and the nice folks over at the comp.lang.tcl newsgroup were very helpful.

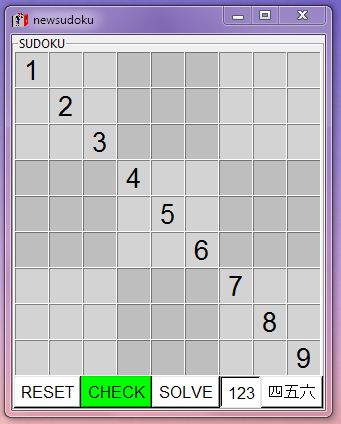
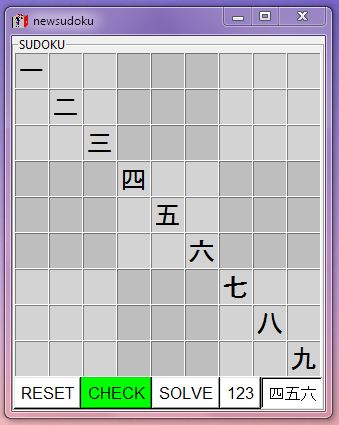
The solving algorithms were just ones pulled out of my … head.  There are probably more that could be added.  Just for fun, it will display in either arabic numerals (1,2,3) or kanji (四,五,六).  It isn’t a puzzle generator, just a solving tool.

For the curious/brave, here are the links to a windows executable, tcl text, ascii text, and a (rather ugly) OS x version.

NOTE: Christian Werner, the author of Androwish, helped me get this running on Android machines.  He also spotted a typo: in the source linked above I use a font I called “courrier” – which doesn’t exist 🙁  It doesn’t throw an error but causes things to look pretty strange on some platforms.  The font is – of course – courier.  I haven’t corrected the code in the links above.

It will look something like this (except on OS X where the native buttons are fugly):

Posted in Default | 1 Comment

Multiple FireFox Launchers

I like to keep a pair of FireFox launchers in my taskbar: one for my home page, and one for The Google.  This used to work OK on Windows 7, but something has changed.

In the past, I could create a new desktop shortcut pointed at Firefox, and just add the URL target I wanted thusly:

C:Program Files (x86)Mozilla Firefoxfirefox.exe" -URL www.google.com

Then just pin the new shortcut to the taskbar, and Bob’s your uncle.  Sometime over the last few weeks or months this has stopped working.  Existing dual launchers continued to work, but anything that touched their target (FireFox upgrade, for instance) would cause one to disappear.  No amount of fiddling and hacking would get it working again.

Aparently there’s new windows code that tries to combine all launchers with the same target into a single launcher (or something).  In the old days, the addtional target option (the -URL …) made them sufficiently different to be allowed.  No more.

The only hack I’ve found to get around this is only a partial fix.  Go to the FireFox program folder:

C:Program Files (x86)Mozilla Firefox

Open a command prompt as Administrator, and create a link:

mklink /h firefox_google.exe firefox.exe

Then create a new desktop shortcut and point it at “…firefox_google.exe” -URL www.google.com and pin that to the taskbar.

This works for me with a couple of quirks.  Launching The Google also highlights the FireFox launcher.  It also confuses FireFox about whether it is the default browser, and it nags about that each time it is launched.  I just turn the nag off.  Every time FireFox gets updated, the links will have to be rebuilt.  Oh well…

It’s useable but not ideal.  Maybe MS will go back to allowing launchers with the same targets but different options.  And winged monkeys might fly out of my…  well, you get the idea.

Posted in Default | Leave a comment

Paint Shop Pro x3 Breaks Windows 7 Slideshow Gadget

Digging deeper into Corel bug obscurity, when Paint Shop Pro x3 is installed on Windows 7, the slideshow gadget loses a nice feature.  Normally, if you see an interesting image in the slideshow you can click on the little magnifying glass icon and the image will open in the default viewer.  With PSP x3 installed, that little icon does nothing.

So far, I can’t get Corel support to understand the bug description, much less work on a fix.

I’ve found that removing a registry key gets the slideshow gadget working again, and doesn’t seem to affect anything else that I use.  For me, deleting this key does the job:

[HKEY_CLASSES_ROOT*shellexContextMenuHandlersCorel.Paint.Shop.Pro.Photo]
@="{B1D2CD8F-45E9-49d1-838A-AAA5780D94B7}"

Back up your registry first, or at least save this key.  If you aren’t comfortable editing the registry, ask your teenager to do it for you.  You can make a real mess if you screw up the registry.

As always, YMMV, and do your own homework to confirm before trying anything I suggest here.

Posted in Default | Leave a comment